Quantcast
Channel: Bible Class Creations
Viewing all 62 articles
Browse latest View live

Fiery Furnace Magic Window

$
0
0

Shadrach, Meshach and Abednego in the Fiery Furnace
Daniel 3
In this enjoyable magic window, you first see Shadrach, Meshach and Abednego.  When you pull the tab on the right, they are in the fiery furnace and the angel appears.
The magic window pattern was made with clipart from the book Bible Story Clip and Copy Patterns by Corbin Hillam.  This is one of my favorite books to use as patterns for many, many things!  This precious book is no longer in print, so Mr. Hillam has graciously allowed me to give you the pattern for free.  He is producing a CD with the art from this book.  The drawings are fantastic!  If you would like to purchase a CD for $15, you can contact him at corbinhillam@yahoo.com.  It is well worth the money!  Other items by him can be seen at www.corbinhillamdesign.weebly.com.


Paper Sack Backpack

$
0
0


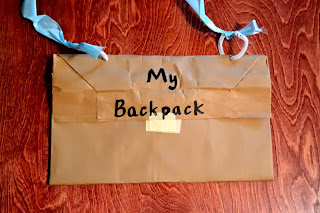
The children like to make and decorate their own backpacks.  I have used these paper sack backpacks for many stories.  Sometimes I use them when the story talks about travelling such as Abraham travels, Mary and Joseph travelling to Bethlehem, Mary and Joseph going to the Festival at the Passover when Jesus was 12, Paul's Missionary Journeys, and many more. 

Sometimes I use the backpacks to hold crafts and papers from the entire quarter.  I send it home at the end with all their "goodies" inside.

For instructions with pictures, click here.


Missions

$
0
0
Missions Lesson

I was asked to teach a series of lessons on missions and missionaries to 3rd and 4th Graders.  To introduce the series, I wanted to do a mini-version of a mission's experience that I participated in during my time of working in the Missions Department in college.

The purpose of the experience was to show a little of what goes into being a foreign missionary (on a very, very simple scale).  I wanted to show them that it wasn't as easy as it sounded.

I divided the children into two groups.  Group 1 was the missionaries from America sent to reach the native people of Waggly. Group 2 was the Wagglies.

I separated the two groups and secretly gave each a set of instructions that the other group could not know about until the experience was over.  The missionaries were instructed to learn about the culture and teach the Wagglies the entire story of the Good Samaritan.  (Fortunately for them, English is the national language in Waggly.)

The Wagglies were given instructions on how to behave which included some odd customs.  These natives would only listen to people who followed all their customs.  

For instructions to both groups, click here.

The evening went very well.  Some "missionaries" picked up on some of the Waggly customs very quickly while others never figured out any of the strange customs.  Some missionaries learned enough of the customs and befriended some Wagglies to the point of beginning to tell the story of the Good Samaritan but none were able to make it all the way through the story as instructed.

We brought the two groups back together and discussed the instructions that each group was given.  Then we discussed what it was like to be the missionary.  All of them said it was much harder than they thought it would be.  Learning the odd customs was their first challenge.  Then when they thought they had learned the customs, they began telling the Bible story and the Wagglies ran off. The missionaries never could figure out why that happened. (See instructions for the Wagglies for details.)

They also said that when they were trying to reach the Wagglies on their own, they became discouraged quickly.  But when some friends were able to come alongside them after learning some of the customs, they felt like they could work together to reach these people.

Though this is an extremely simplified version of what it can be like to be a missionary, the children were more sympathetic and more mindful of the current missionaries we are supporting.  They were even more anxious to hear from many of the people in our congregation who are or have been missionaries and who would be presenting real life missions experiences in Bible class over the next few weeks.  

In the end, several decided they would like to be foreign missionaries when they grow up and others said it changed the way they pray for the missionaries we have and will have in the future.  

All in all, it served as a great opening lesson to our series on missions!


Joseph Interprets Pharaoh's Dreams

$
0
0

 This fat cow when folded turns into this skinny cow below.


Joseph Interprets Pharoah's Dream
Genesis 41

Pharaoh has a dream in which he sees seven fat cows by the Nile. Then out of the Nile came seven skinny cows who then ate the seven fat cows.  When God allowed Joseph to interpret the dream, he told Pharaoh that this meant the nation would have seven years of great harvest followed by seven years of famine.  This is a fun take home for the children to use to retell this story.

The top picture is the fat cow. This cow becomes the skinny cow by folding the paper horizontally two times.  First, fold the paper down from top to bottom matching the lower two line markings on the page. When folded, the cow is on the inside of the page. The fold lines are indicated by the red dotted line in the picture below.  The red dotted line is not on the page to be printed but there are two small black lines on the edge of the paper to act as a guide. Use the bottom black lines the first time.


Second, fold the paper up (so that you can now see the cow's upper body) along the area indicated by the dotted red line in the picture below.  The dotted red line is not on the page to be printed but two small dark lines are on the edge of the paper to act as a guide.


When finished, it will become the skinny cow.

To print the cow page, click here.

Widow's Jar that Doesn't Run Dry

$
0
0

Elijah and the Widow's Oil
I Kings 17:7-16

This creative jar provides one way to tell the story of Elijah and the Widow's Oil.  With this jar, the "oil" is poured out until there is no more.  Then it mysteriously refills so that more oil can be poured out.  This can be done several times giving the appearance that it will never run dry.

For instructions with pictures, click here.
For another option on how to make this jar, click here.

Bible App for Kids

$
0
0
Bible App for Kids

Because technology is the language of many of today's young learners, from time to time I want to recommend some of my favorite technology tools or include some tips on how to use technology either at home or in a Bible class setting.

YouVersion has provided a fantastic free Bible app for kids to use on the iPhone, iPod, iPad, etc.  This app can be used at home or in the Bible class setting to teach children about God.  This app is what the name implies, a Bible story app.  At the beginning of each story is a story title but also the scripture reference such as Genesis 1:1-2:4.  The app currently does not contain the entire Bible but more is being added.

The children are enthusiastic about this app because it contains beautiful artwork and is interactive.  The children can touch on various items in each picture which makes the items come alive.  There is also a game included as a part of each story where you have to search for and collect an item.  This is optional.

One thing I like is the option in the settings menu which allows the user to have the story read to him/her or let the child read on his/her own. I also like the option to turn the sound off.  I would use this in a young children's Bible class and turn the sound off so we could discuss each page.  I would let children take turns touching items on the page to see how they come alive.

I have downloaded several Bible story apps but this one is my favorite.

If you want to download this free app, there are several ways to do that:

Website: bible.com/kids

Altoid Tin Creation Game

$
0
0
Altoid Tin Creation Game
Genesis 1


Materials:
  • 1 Altoid Tin for each person
  • 1 frozen juice lid for each person
  • 1 number mold
  • Plaster of Paris and water
  • Different types of scrapbook paper that will match the days of Creation
  • Scissors
  • E6000 glue (or any other glue that will glue a magnet to the plaster piece)
  • 7 magnets for each person
  • Animal, people, and fish (possibly moon and stars as well) stickers for each person
  • 7 colors of Acrylic paint
  • Paint brushes
  • something to cover the table that can get messy

Instructions:

A few days before class:
  1. Mix a small amount of the Plaster of Paris according to the directions. Don't mix a huge amount, as it will dry while waiting to be poured into the mold.
  2. When pouring the Plaster into the mold, I prefer putting the plaster in a ziploc bag and cutting of a small portion of one corner. The plaster can then be poured into the mold easily and more controlled like frosting a cake.
  3. After the plaster is dry, take the numbers out of the mold and glue a magnet on the back of each number.  Stick a set of numbers to one juice lid.
  4. Cut out circles from scrapbook paper that will fit just inside the juice lid. Make one pattern and you can cut several at a time.  You could use a Cricut to cut the circles too. Match the paper with what was created on that day. For example, grass paper for Day 3.
  5. For the top of the Altoid tin, we cut a notepad page that looked like the earth.
  6. Place one juice lid with the 7 unpainted numbers, stickers (animal, people, and fish), and 7-8 scrapbook paper circles inside an Altoid tin.

When you get to class:
  1. When you get to class, cover the table with something to protect it such as a trash bag or paper. 
  2. Let the children paint the numbers with a different color on each number.
  3. Let them dry.
  4. Let the children put the stickers on the scrapbook paper they go with.
  5. Play the game.  Have the children put one scrapbook circle on the juice lid.  Have them put the number that matches that Day of Creation.  Make it a race if you wish.
  6. Let the children take them home and teach a friend how to play.
For simple, printable instructions, click here.

Book from Border

$
0
0

Book Made from Bulletin Board Border

I found this border at Teacher Heaven and Mardel's.  It was a border with scenes from various Bible stories.  I cut it apart and used the binding machine from our church to bind them.  They made simple review books for the children to look at and retell our stories.  If you don't have a binding machine, packing tape would work very well to put the pages together.

Book Creator App

$
0
0
Book Creator iPad App

Though this app costs $4.99, this has become one of my all time favorite apps because of its versatility! There are a ton of different ways this app can be utilized! (The only downside is that though you can view the books on an iPad, iPhone, iPod, or computer, you can only create the books on an iPad.) 

This app is extremely user friendly for people of almost any age.  It is easy to navigate and easy to learn. I have made books to use as teaching tools, have let children as young as 3 help me make a book for the class, and have let children from kindergarten to fifth grade create their own books to illustrate a Bible story or an application to the Bible story.  

With an iPad, pictures and videos can be taken and inserted on the spot. No other programs needed. Sound can be recorded and inserted instantly.  No other programs needed. The children can even draw their own pictures to illustrate something and record their voice telling or retelling the story. Words can either be typed in or written on the page.  It's so simple, my kindergarten students make their own books all the time (by themselves)!  The app has a short and simple tutorial at the beginning which teaches you all the features.

One specific example of how I used this app was making books for my little ones (3s and under) to see in Bible class.  This book was made when we were studying creation.  Here are a few sample pictures from the book I created using this app.  On each page, I included a small speaker icon.  If the child (or adult) touches the speaker icon, a young child reads the page out loud. (In this case, I asked a five year old at our church to read the pages.)


This is the title page.


This is the instructions page.  

On the following pages, I have hidden a sound icon under the nose of each animal so that when the child touches the nose, the child will hear the animal sound.  To make the sounds, I showed one picture to a 3 year old child in my Bible class and asked him/her to make the sound of that animal.  Are the sounds professional? No, but they are absolutely precious! (On some pages, there is a slight delay after pushing the speaker icon.  Children this young don't do things on demand.)  The best thing about this is that we made this in class in about 5 minutes or less.  I can share this book with the parents and grandparents. Each parent can have a copy of the book (their child helped to create) on their iPhone, iPod, iPad, or computer. (I will give instructions on how to share these later in this article.)


When making a book that will contain pictures, either take the pictures yourself or make sure you use pictures that are public domain or copyright free.

My favorite way to share these books is by putting them in Dropbox. If you don't have a Dropbox account, I recommend signing up for a free account at www.dropbox.com.


You can obtain a free copy of my book, God Made Animals, on your iPhone, iPod, iPad, or computer by using the following instructions.  Please do not edit or sell this book.


It's your turn.  Have fun creating your own books!!


Daniel and the Lion's Den

$
0
0
Daniel and the Lion's Den
Daniel 6

Take any simple coloring page for Daniel and the Lion's Den.  Let the children use their fingerprints to stamp manes on the lions!  

Moses Face Glows

$
0
0

Moses Face Glows Blacklight Sheet
Exodus 34:29-35

For this effect, I found a simple coloring page to enlarge onto a sheet.  I used a transparency and an overhead but a computer and projector will work as well.  I traced the lines with different colored fabric markers, then painted with face with glow in the dark paint. If you use a tan or off white sheet, the paint will be less likely to show up before you want it to. I heat set the fabric in the dryer.

When telling the story, I have the sheet hanging on a wall.  When Moses comes down from the mountain, I turn on a blacklight or I turn off the lights.


Aaron's Rod Turns into a Snake

$
0
0

Aaron's Rod Turns into a Snake
Exodus 7

The top picture is a picture of the back of a plastic snake I found at the Dollar Store.  I found some larger ones and some smaller ones.  When I tell the story, I use two larger ones connected together.  I take the head off of one and the tail off the other.  I connect the two snakes into one really long snake.  When holding it beside me to look like a rod, I hold the head in my hand where they cannot see it.  I make sure the kids see this back side of the snake so it looks like I have a rod in my hand.

When the story indicates, I toss the "rod" down and it curls up where the kids can see the snake side.  

I purchase these smaller ones for the kids to take home.  They aren't rod size for them but they do get the point across.  They get a kick out of turning their "rods" into snakes.

(Sometimes I paint the back of the snake to look more like a rod, but it is not necessary.)

Repentance Activity

$
0
0


Repentance Activity
John the Baptist Prepares the Way
Matthew 3:1-12


Finding activities to go along with the story of John the Baptist can be rather tricky.  When creating this activity, I had in mind children who like to move around and not sit still or children who have been sitting all day in school.  

For this activity, you will need one set of the red, purple, orange, blue or yellow cards per team and one copy of the green cards.  The green cards have words that would show behavior of a person who has repented. The other colored cards show negative behaviors.

Tape or pin the green cards to the wall in different places around the room in a random order.  Give each team a set of colored cards (red, orange, etc.).  Have each team go around the room and find the repentant behavior card to match their card.  (I paired my struggling readers with my strong readers so they could help each other.)  

Have the children use an erasable marker to write the number of the green card on the back of their card.  For example, if their first card is “lies”, then they must find the green card that says “tells the truth”.  Because there is a number 3 on the card that says "tells the truth", the children would write the number 3 on their card that says “lies”.  (This way the other groups don’t see what they have chosen.)

When the groups have finished, come back together and discuss their findings.


The children have enjoyed moving around the room and working in partners on this activity.  

For instructions and printable cards, click here.

Zechariah and the Angel Glow in the Dark Sheet

$
0
0
 (lights on)


(lights off)
Zechariah and the Angel
Luke 1:5-25

I found a coloring page for the pattern for this project.  I purchased a creme colored bed sheet and cut it into fourths.  This is painted on one fourth of that sheet.
I drew Zechariah with a permanent marker.  I painted the angel with Glow in the Dark paint.  It shows up in the top picture because of the way I took the picture.  When it is hanging up on the wall, the children cannot see the angel.

When I turn on the blacklight or turn off the lights, the angel suddenly appears.

After telling the story, I let the children make a magic window where at first you see only Zacharias and then, after pulling a tab, the angel magically appears.  They can take it home and retell the story.


Zechariah and the Angel Magic Window

$
0
0
 This picture is of Zechariah in the temple.

When you pull on the right edge of the top picture, Zechariah slides out of the frame and an angel "magically" appears.


Zechariah and the Angel
Luke 1:5 - 25

I use the black light sheet when telling the Bible story.  The children make one of these to take home so they can retell the story. 


Other Magic Windows

The magic window pattern was made with clip art from the book Bible Story Clip and Copy Patterns by Corbin Hillam.  This is one of my favorite books to use as patterns for many, many things!  This precious book is no longer in print, so Mr. Hillam has graciously allowed me to give you the pattern for free.  He is producing a CD with the art from this book.  The drawings are fantastic!  If you would like to purchase a CD for $15, you can contact him at corbinhillam@yahoo.com.  It is well worth the money!  Other items by him can be seen at www.corbinhillamdesign.weebly.com.

Ananias and Sapphira - God Knows What's in Your Heart

$
0
0

Ananias and Sapphira
Acts 5:1-11

When teaching the story of Ananias and Sapphira, I depended on assistance from my teenage daughter.  We acted out a small application story.  I would ask her questions.  Her answers would not be in line with her actual feelings. For example, while I was pretending not to listen, she told the kids how mad she was with her friend because the friend.  I came over to her and asked how things were going.  She would say they were going well.  I told her that God knows what is really in her heart.  I told her there was anger in her heart. She would open up the Valentine heart and a picture of an angry face with the word "anger" was inside.  We then discussed how she could forgive her friend and change what is inside her heart.

While I was talking with the kids a little about forgiveness, my daughter changed the picture and words inside the heart.  We performed several scenarios like this one.  One of them was a lie, one was sad, one was love.

God always knows what is inside our hearts even if our words spoken to people do not match what is actually inside our hearts.  Ananias and Sapphira said one thing to the people but God knew exactly what was in their hearts.

I was given this Dove Candy Valentine container (with candy inside!) for Valentine's from a child.  I saved the container hoping to use it for something like this.  It worked very well. Any Valentine's candy box would work.

I put tape on the back of the pictures ahead of time so my daughter could change the pictures out quickly.

For a script of this lesson, click here.

Telling Lies - Ananias and Sapphira

$
0
0


Ananias and Sapphira
Acts 5:1-11

As an application story for Ananias and Sapphira, we spent time discussing telling the truth and telling lies. Sometimes we tell "little white lies" to cover up something so we won't get into trouble.  But then we find we have to tell another lie to cover up that one, then a bigger lie to cover up that one, then a bigger lie, and so on.

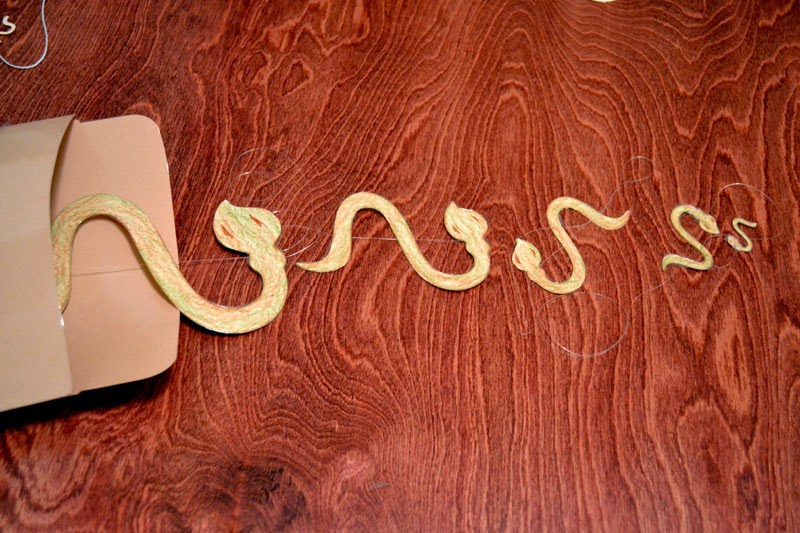
When we were discussing this, I had a large tan paper (card stock) pocket in my hand.  When I told them about the little white lies, I pulled out the little bitty snake. (They could not see the other snakes.) I told them that when they tell lies, it's like this little snake was in their own pants pocket.  It might bite but it wouldn't hurt much.  Then as the lies got bigger, so did the snakes. Each time the snakes got bigger, the children got more and more worried. I told them that if the larger snake bites, it hurts worse and worse.  When we got to the largest snake, their eyes opened wide.  

Telling little lies often grows into bigger and bigger lies.  Even telling a little lie is bad.  It's like having a little snake in your pocket.  The best thing to do is to tell the truth even if it means you will get into trouble.  God always wants us to tell the truth.

The snakes are all connected with fishing line.  The fishing line is taped to the back of each snake.  There is about 6-8 inches between each snake so when one snake is pulled out of the pocket, the next larger snake cannot be seen.

I let each of the children make one of these to take home.  Instead of fishing line for them, I let them use a thin string. (Fishing line curls up too much and made it too difficult for the children to make by themselves.) 

For my snakes, I did not find a pattern nor did I have a die cut; but since I had 30 children in the class, I had to find a machine to cut them all out.  I actually used a pattern of a lion's tail on a Cricut die cut cartridge (Paper Doll Dress Up).  I cut 5 different sizes of the tail.  I cut the snakes out of creme colored card stock. The children colored each one to look like a snake and then taped them to the string.  They created the pocket for the snakes out of two half pieces of construction paper. 

When this step was complete, the children glued the application story on the pocket so they could retell the application story at home.

I created a snake pattern for you.  For the snake pattern, click here.

For story to glue on the pocket, click here.


Spoon Lion

$
0
0
Daniel and the Lion's Den
Daniel 6

The children made these lions from plastic spoons.  I had pre-cut the yarn. The children drew a lion face on the back of their spoons with permanent markers. (Obviously, my teen helper drew this face as a sample.)  The children then turned the spoons over and put a lot of glue on the spoon.  Then they put the yarn in the glue.  We made these at the beginning of class so they would be mostly dry by the end of class.

Handwriting on the Wall Craft

$
0
0
Handwriting on the Wall
Daniel 5

For this craft, I printed the page with the picture of the king and the wall. Then I put a page (which contains the words Mene Mene Tekel Parsin) under the first page so I can use it as a pattern.  Using a white crayon, write the words "MENE MENE TEKEL PARSIN" in the box.  Make sure you press really hard. 


I tell the story until I get to verse 5.  Before reading verse 5 (the hand appears and writes on the wall), I tell the children that I forgot to put color on their pages and I need help finishing that part.  I tell the children that they need to first paint the wall (the rectangle) and that we will paint the king later.  As they watercolor paint the wall, letters and words begin to appear! After they have finished, we finish reading and telling the rest of the Bible story. 

For the younger preschool children, I used Elmer's White Glue and traced the letters using glue on the page that has MENE MENE TEKEL PARSIN on it. I let it dry. I make one page like that for every child.  

I give the children a page with the words and then lay the picture on top. They use crayons to color the wall.  As they color the wall, the words will magically appear.  (Like a penny rubbing.)


For pattern, click here.


Deborah and Barak

$
0
0
Deborah and Barak
Judges 4

This cute idea came from Pat Autrey.  

Deborah is sitting on a paper chair. To make her sit, just fold at the waist and where the dress meets the legs.  I use a plastic palm tree for her to sit under. (I also found a fun foam palm tree at Michael's).  For her clothes (as well as Barak's clothes), I used a tissue art technique.  (Click here to see a video on this technique.)


To make Barak stand, I folded on the fold line just below his garment (where the legs connect to the garment) and glued a clothespin on the back.

Instructions for making the box, click here.
For patterns, click here.


Viewing all 62 articles
Browse latest View live